-open the hood.
-under the hood, take out the five pins that secure the upper part.
-from the bottom, unscrew the screws and take out the pins that secure the lower part.
-turn the wheels to the side.
-in the wheel arches, unscrew the screws that secure the fender liners (front part).
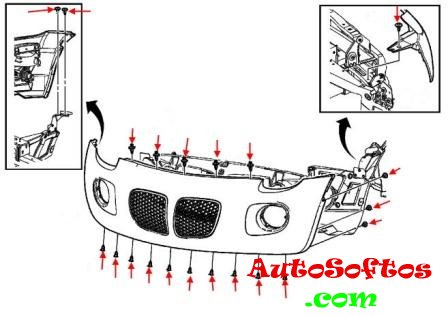
-under the hood, take out the five pins that secure the upper part.
-from the bottom, unscrew the screws and take out the pins that secure the lower part.
-turn the wheels to the side.
-in the wheel arches, unscrew the screws that secure the fender liners (front part).