
You are logged in as a guest, we recommend that you log in or go
process of registration. If you forgot your password, you can restore it
Navigation
Top News
Statistics
Advertisement
Аrchives
Votes
| Rate the site |
How to remove the front and rear bumper AUDI A6 C6
Author: carsoftos777 | 7-04-2023, 14:16 | How To Remove Bumpers | Views: 888 | Comments: 0 | Found a bug?
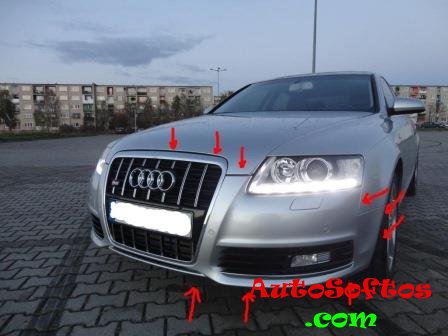
The bumper is removed together with the grille (beard).
-under the hood, Unscrew the upper bolts of the grille and bumper.
-at the very bottom of the bumper along the entire length, Unscrew the screws securing the engine protection and fender liner.
-Unscrew the wheels left or right, depending on which side of the bumper will be unscrewed first.
-Unscrew the screws (usually under the asterisk) securing the fender liner to the bumper.
-Now the hardest part, you need to unscrew one nut on each side that attach the bumper to the fenders. You will need a 10 head with an extension (about 30 cm) and a ratchet. Move the fender liner to the side and unscrew the nuts. In some models, depending on the engine, there may be a washer reservoir or a charcoal filter under the wing, which make it difficult to access the nuts.

-pull off the bumper from the side latches.
-carefully pull the bumper towards you (it is advisable to do this together, so as not to scratch the paint on the wings with studs).
-Now you can disconnect the connectors from the fog lights.
- if there are headlight washers, disconnect the hoses from the injectors and close them with stoppers so that no liquid flows out of the reservoir.
-remove the bumper.

Rear bumper

-remove the side trim in the trunk (you need to access the inside of the rear lights).
-under the rear lights, unscrew two nuts on each side (you will need a 10 head with an extension cord).
-Unscrew one nut on each side under the lights closer to the trunk lid.

-at the bottom of the bumper, Unscrew the bolts under the asterisk (if any).
-Unscrew the screws connecting the bumper with fender liner.

-pull off the edges of the bumper from the side latches.
-remove the bumper.

Tags:
Information
Users of Guests are not allowed to comment this publication.
Users of Guests are not allowed to comment this publication.